IALA Maritime Buoyage System
The definitive visual guide to navigating safely — and passing your exam.
Buoyage is the "highway code" of the sea. Knowing the buoys and marks is essential for safe navigation. Here are the key visual diagrams for your study.
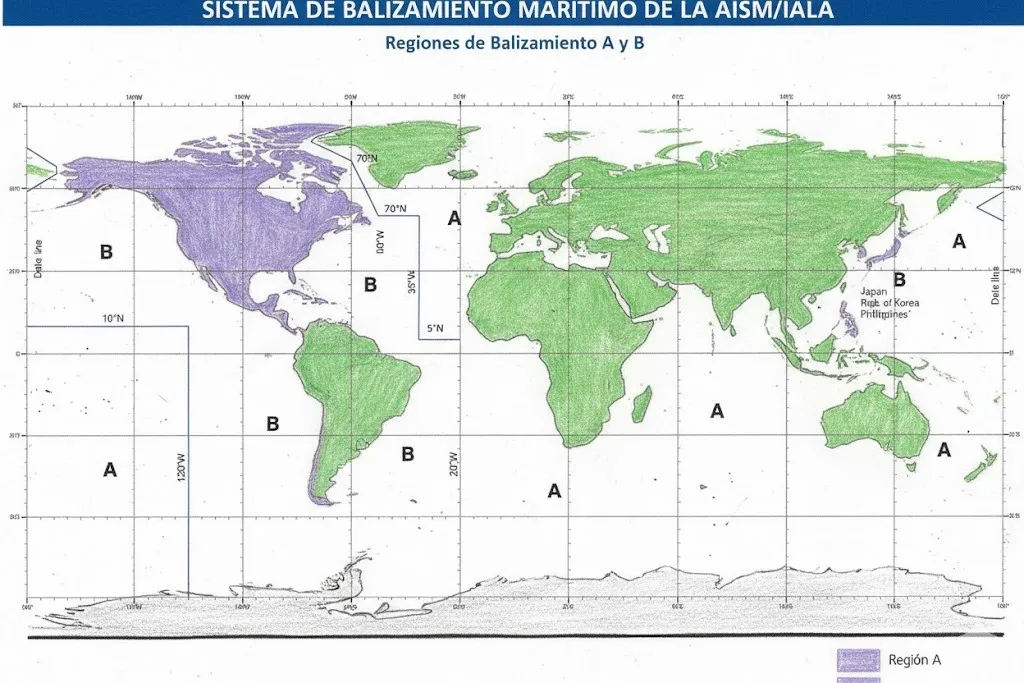
IALA Buoyage Regions A and B
The world is divided into two main regions for the lateral buoyage system (port and starboard sides):
- ARegion A (Rest of the World) Europe, Africa, Australia and most of Asia. Here, RED is Port and GREEN is Starboard (when entering harbour).
- BRegion B (Americas and surroundings) Americas (North, Central and South), Japan, Korea and Philippines. Colours are REVERSED compared to Region A.
Note! Spain belongs to Region A.
Mark Shapes
Not only colour matters; the shape of the buoy or its topmark tells us what it is, even in silhouette.
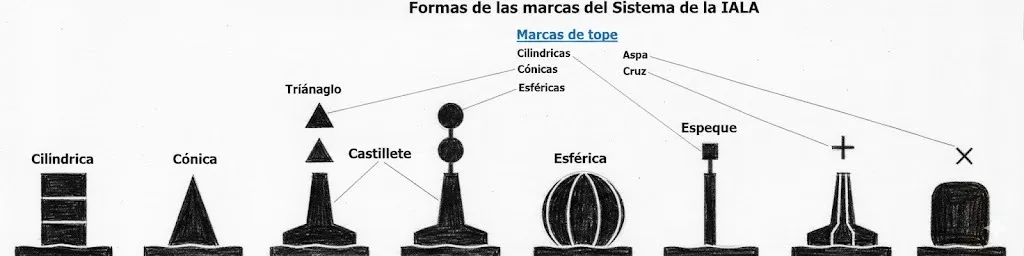
Cylindrical
Lateral Mark Port (Region A)
Conical
Lateral Mark Starboard (Region A)
Spherical
Safe Water
Cross (X)
Special Marks
Cardinal Marks
They indicate the safe side to pass (North, South, East or West). They are black and yellow. The key is in the topmarks (cones):
- ▲▲ NORTH Points up. Black above.
- ▼▼ SOUTH Points down. Black below.
- ▼▲ EAST Base to base (egg shape). Black top and bottom.
- ▲▼ WEST Point to point (hourglass, wasp waist). Black in the middle.
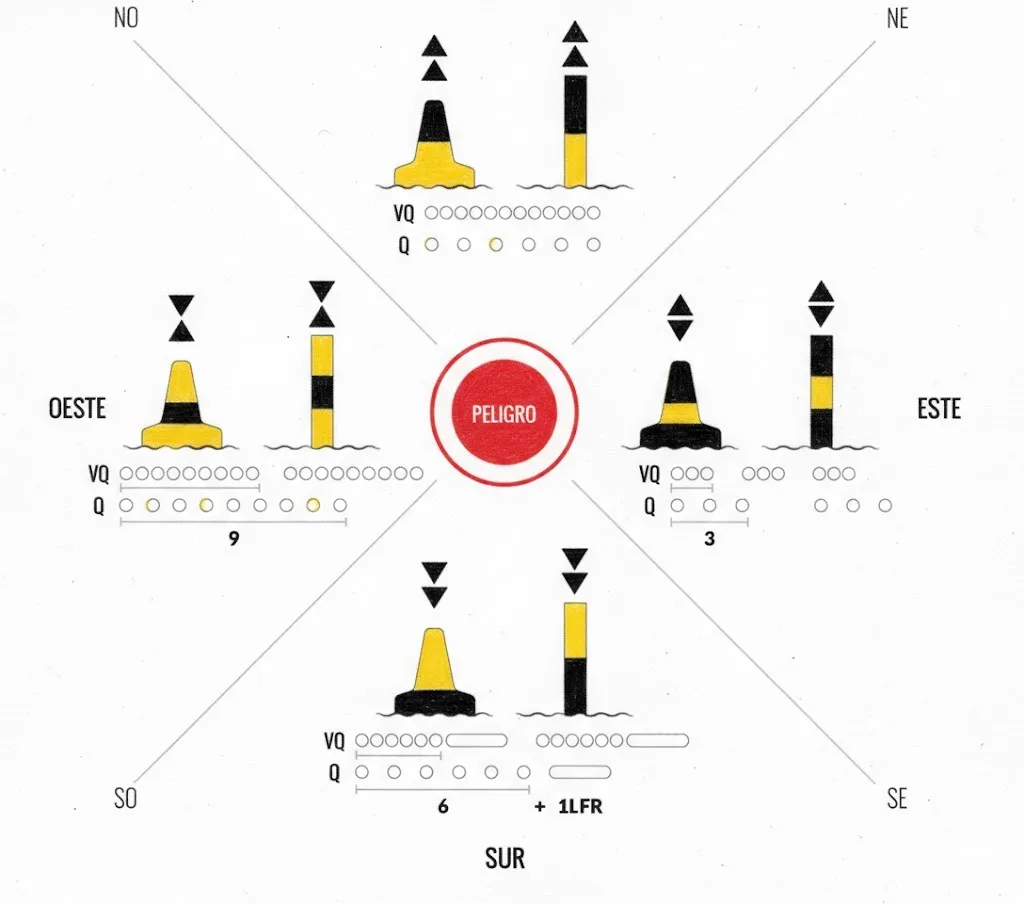
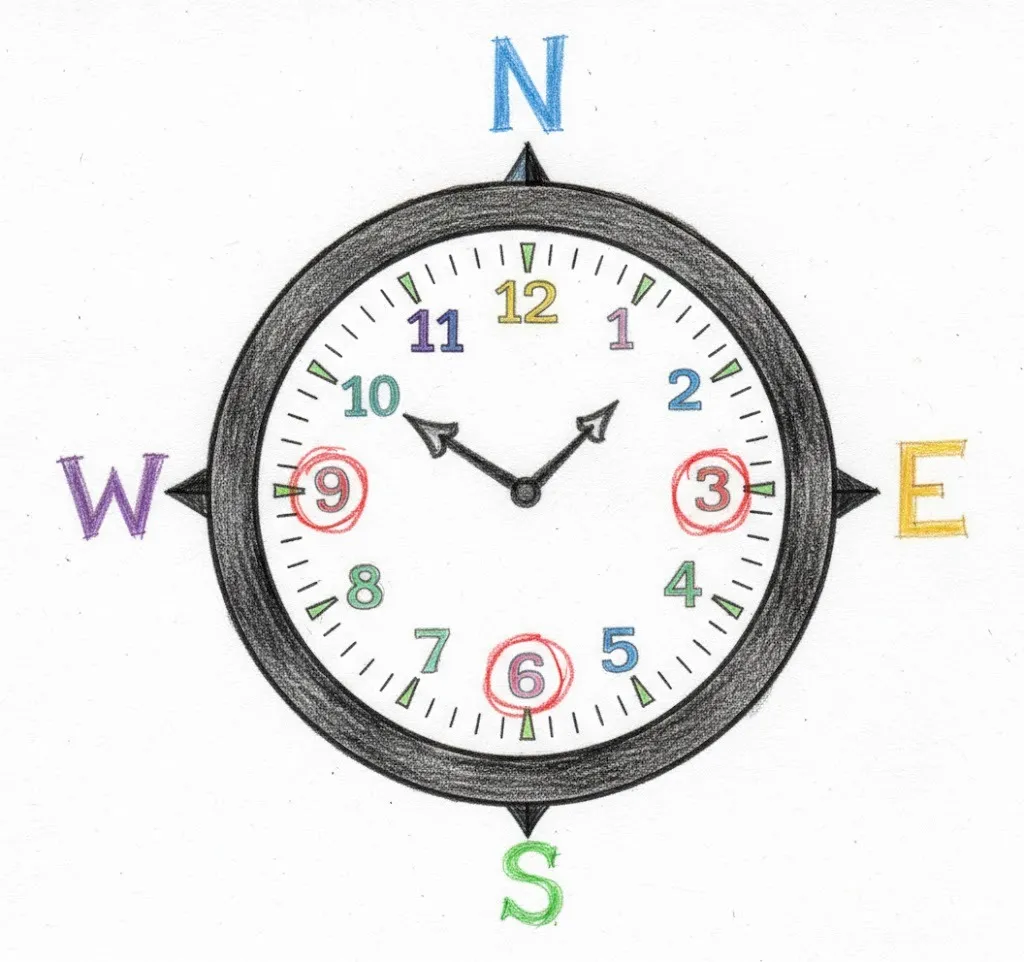
The Light "Clock"
To identify cardinal marks at night, think of a clock face. The number of flashes matches the hour:
EAST (3 o'clock)
3 quick flashes every ~10s.
SOUTH (6 o'clock)
6 flashes + 1 long flash. (The long one avoids confusion with 3 or 9).
WEST (9 o'clock)
9 quick flashes every ~15s.
NORTH (12 o'clock)
Continuous quick flash (Q) or very quick (VQ). Non-stop.
New Danger Mark
Used to mark a recently discovered hazard (shipwreck, obstacle) not yet shown on nautical charts.
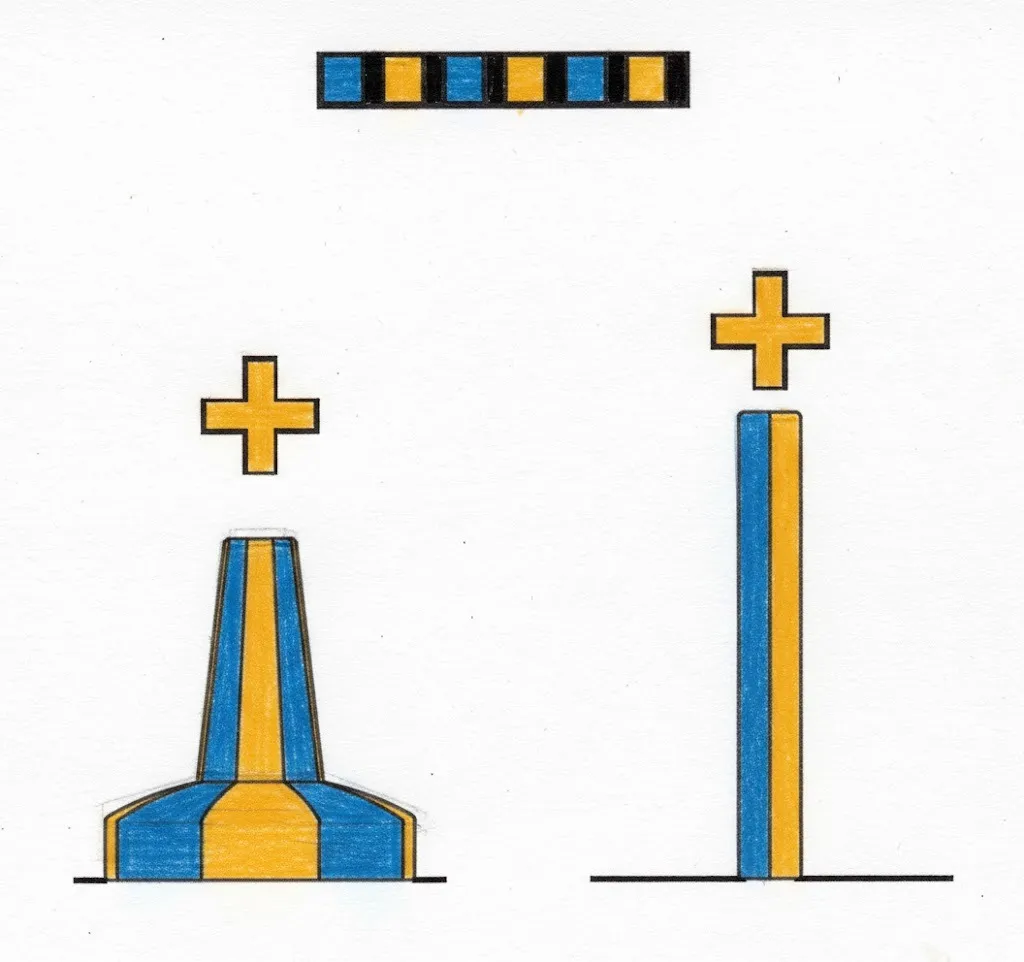
Key Features:
- Vertical Blue and Yellow stripes.
- Topmark: Yellow Cross (vertical + horizontal, '+' sign).
- Light: Alternating Blue and Yellow (1s blue, 0.5s off, 1s yellow, 0.5s off).